Endura Flap Thermo Panel 3e - Replacement Flap Instructions
Installation Instructions
Thermo/Quick Panel & Sliding Window
 Difficulty Easy
  Steps 11
  Time Required 0.5 Hours
  Sections 03
  Flags 00
 Parts
- 1 Replacement Flap
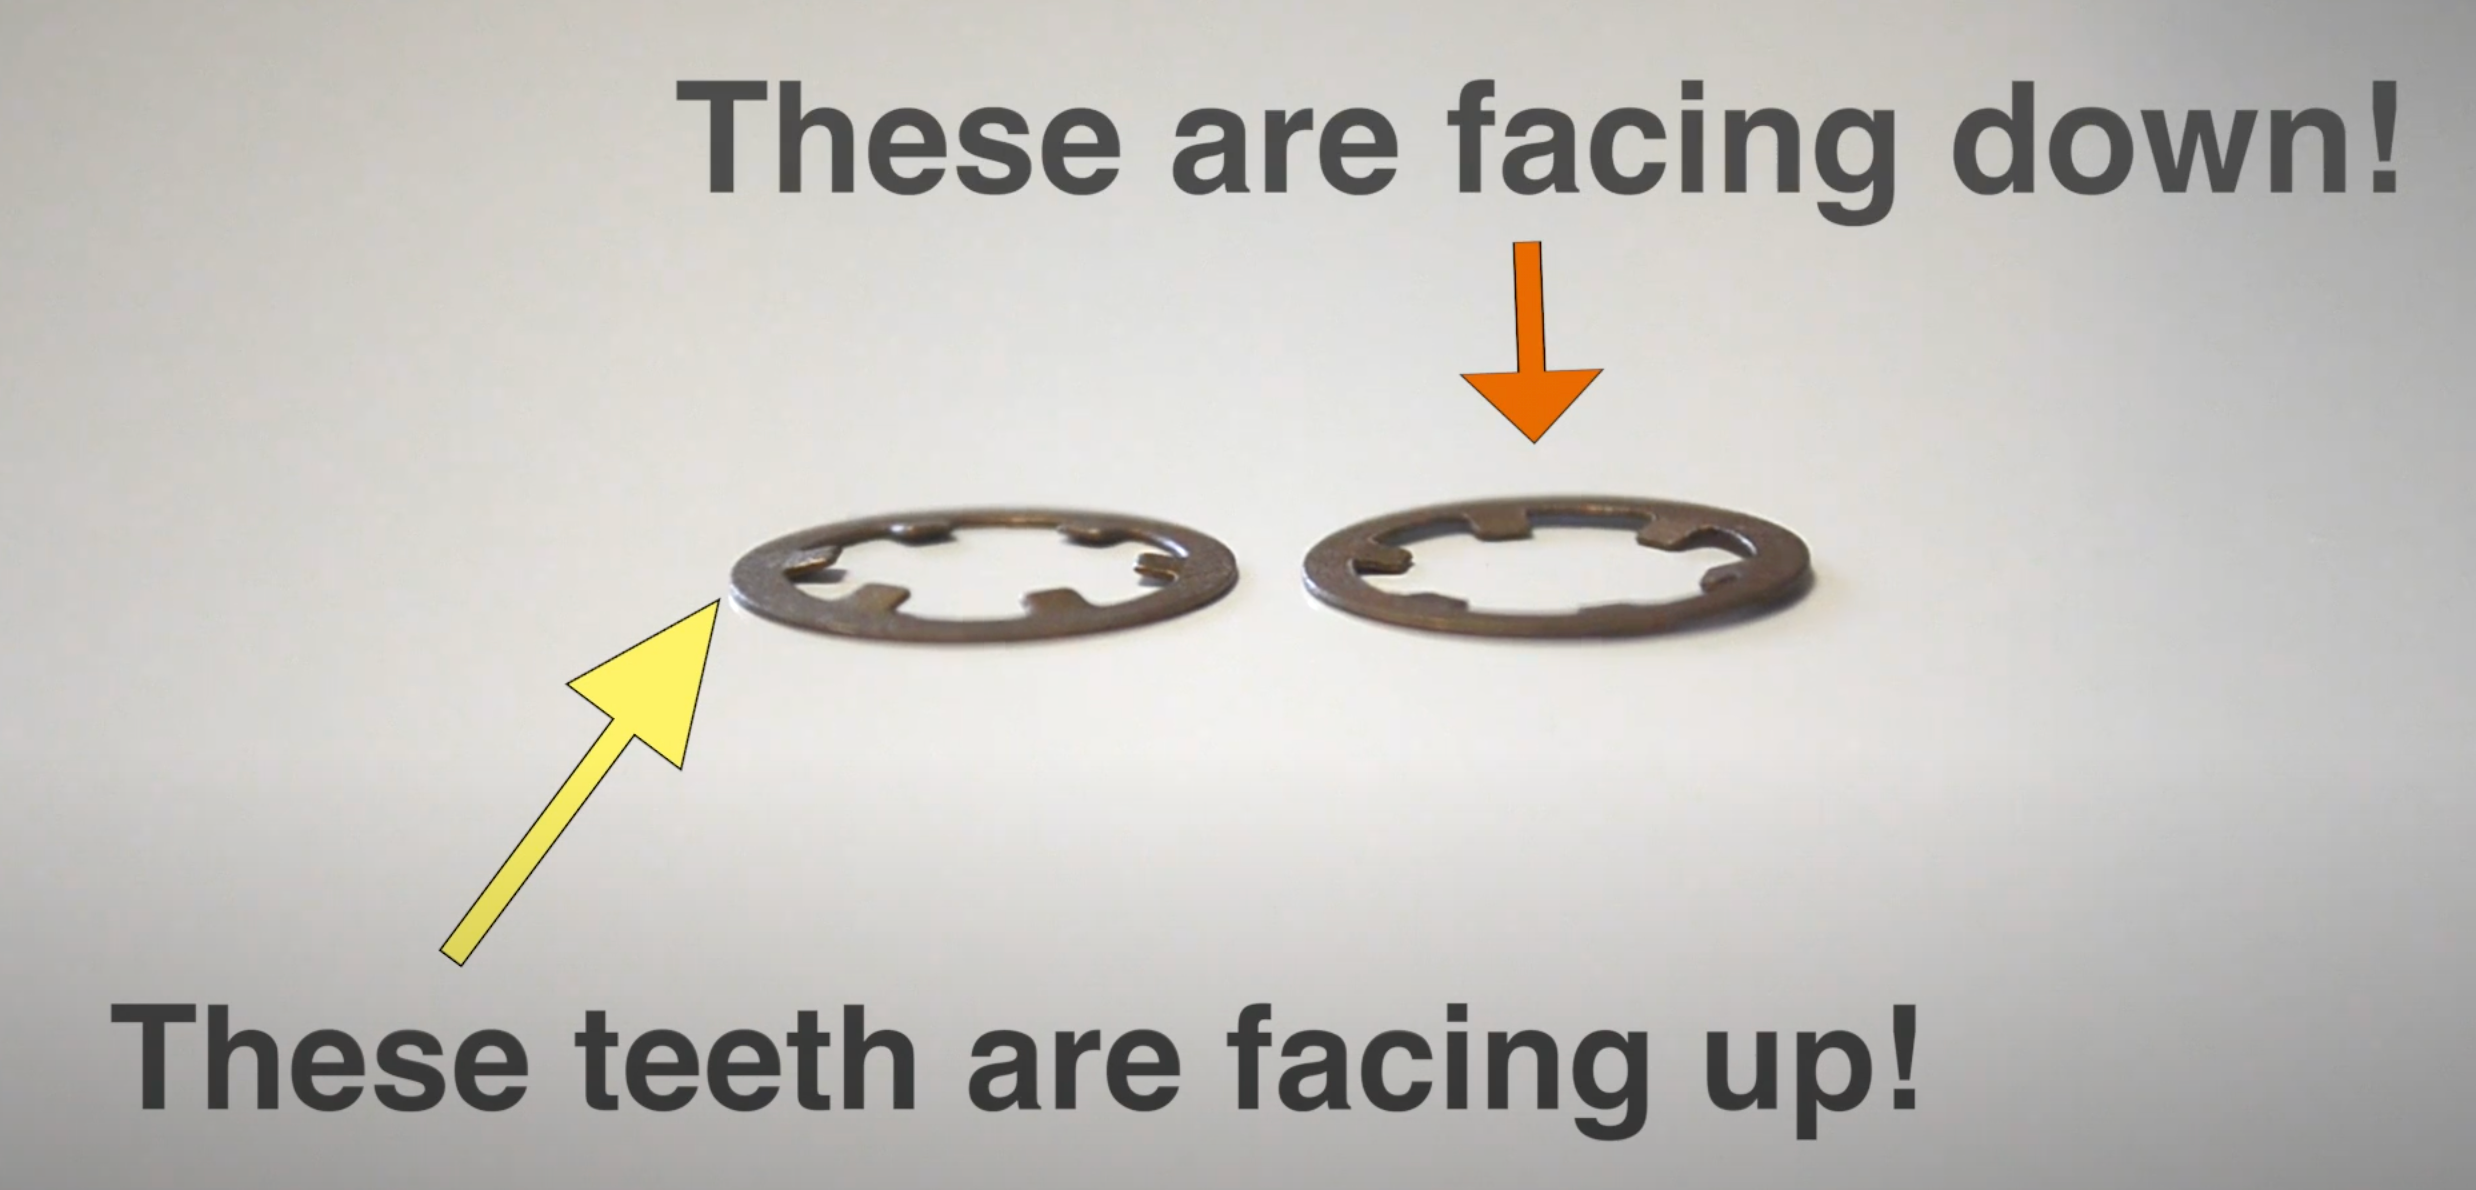
- 3 Retainer Rings
Tools
- Magnetic Phillips head #2 screwdriver
- Flat head screwdriver
Step 1 Position the Panel

- Lay the panel down on its edge, so that you can see the screw holes that are on the sides of the panel.
Step 2 Remove the Bottom Screws

- Remove the two screws nearest to the bottom of the panel on both sides.
Step 3 Loosen the Second Set of Screws

- Locate the second set of screws, right under the glass on either side.
- Loosen each screw a quarter turn.
Step 4 Remove the Flap

- Slide the flap assembly out of the bottom of the panel.
Step 5 Locate Flap Rod


- Locate the rod that holds the flap.
- If you have retainer rings that are holding the rod in place then you can pop one off using the flat head screwdriver.
- Then slide the rod out and remove the old flap.
- Slide the rod out and remove the old flap.
Step 6 Check the Magnets

- Position the new flap in place in the frame and make sure the magnets are attracting correctly. If they are not, try flipping the flap around (switching the interior and exterior faces).
Step 7 Loosen the Bellows

- Sometimes the bellows (accordion-like sides of the flap) contract during shipping and prevent the magnets from attracting.
- To fix this, remove the pivot washers from the top corners of the flap and use a blow dryer to lightly heat the bellows and stretch them back out.
Step 8 Position the New Flap
- Guide the rod through the flap and frame.
- If you removed a retainer ring, put a new one on by holding the other side of the rod in place while pushing the ring on with your fingers.
Step 9 Re-Install Flap Assembly

- Slide the flap assembly back in place in the bottom of the panel.
- Be sure that the tracks for the locking cover are on the same side as the height adjustment locks at the top of the panel.
Step 10 Attach Bottom Piece

- Screw in the bottom piece with the two screws that you removed.
Step 11 Tighten Middle Screws
- Tighten the screws that are under the glass.