Endura Flap Single Flap Door Mount (Original Design) - Replacement Flap Instructions
Installation Instructions
Click to view the Double Flap Door Mount Replacement Flap Instructions.
 Difficulty
Easy
Difficulty
Easy
 Steps
09
Steps
09
 Time Required
0.5 Hours
Time Required
0.5 Hours
 Sections
03
Sections
03
 Flags
04
Flags
04
Parts
- 1 Replacement Flap
- 3 Retainer Rings
- 8 Hole Plugs*
Tools
- Magnetic Phillips head #2 screwdriver
- Flat head screwdriver
- Drill
*Replacement flaps come with two sets of hole plugs, but you will only need to use one on your flap. For your door, use the set of 8 large hole plugs and discard the set of 4 smaller hole plugs.
Step 1 Remove the Hole Plugs

- First remove the Endura Flap from the door or wall.
- To do this, you will need to remove the hole plugs. Don't worry, we sent you some extra ones!
- You can drill a hole in each plug and wiggle the plug out with a screwdriver to pull them off.
Step 2 Unscrew the Frame

- Use the Phillips head screwdriver to remove the screws that were under the hole plugs from the frame then remove the entire flap assembly from the door or wall.
- Carefully bend the tabs holding the tunnel together upwards until horizontal, then remove the long side pieces of the tunnel by sliding them off of the flattened tabs.
- You can use the flathead screwdriver to get it started. Careful! The tabs may snap off if bent too much.
Step 3 Remove Retainer Ring


- Look for a metal rod at the top of the flap frame—remove one of the circular metal retaining rings by forcing it off with a flathead screwdriver.
Step 4 Remove the Rod

- Push the metal rod through the flap frame until it comes out on the other side.
- Pull the rod out and remove the flap.
Step 5 Expand the Bellows

- Position the new flap in place in the frame and make sure the magnets are attracting correctly. If they are not, try flipping the flap around (switching the interior and exterior faces).
- Sometimes the bellows (accordion-like sides of the flap) contract during shipping and prevent the magnets from attracting. To fix this, remove the pivot washers from the top corners of the flap and use a blow dryer to lightly heat the bellows and stretch them back out.
Step 6 Check the Magnets

- Before installing your new flap you should check to make sure that the magnets in the flap and the frame are attracting correctly.
- If they seem to be repelling, you probably need to flip the flap around so they work properly.
Step 7 Position the New Flap
- Guide the metal rod back through the flap and frame.
Step 8 Install Retainer Ring
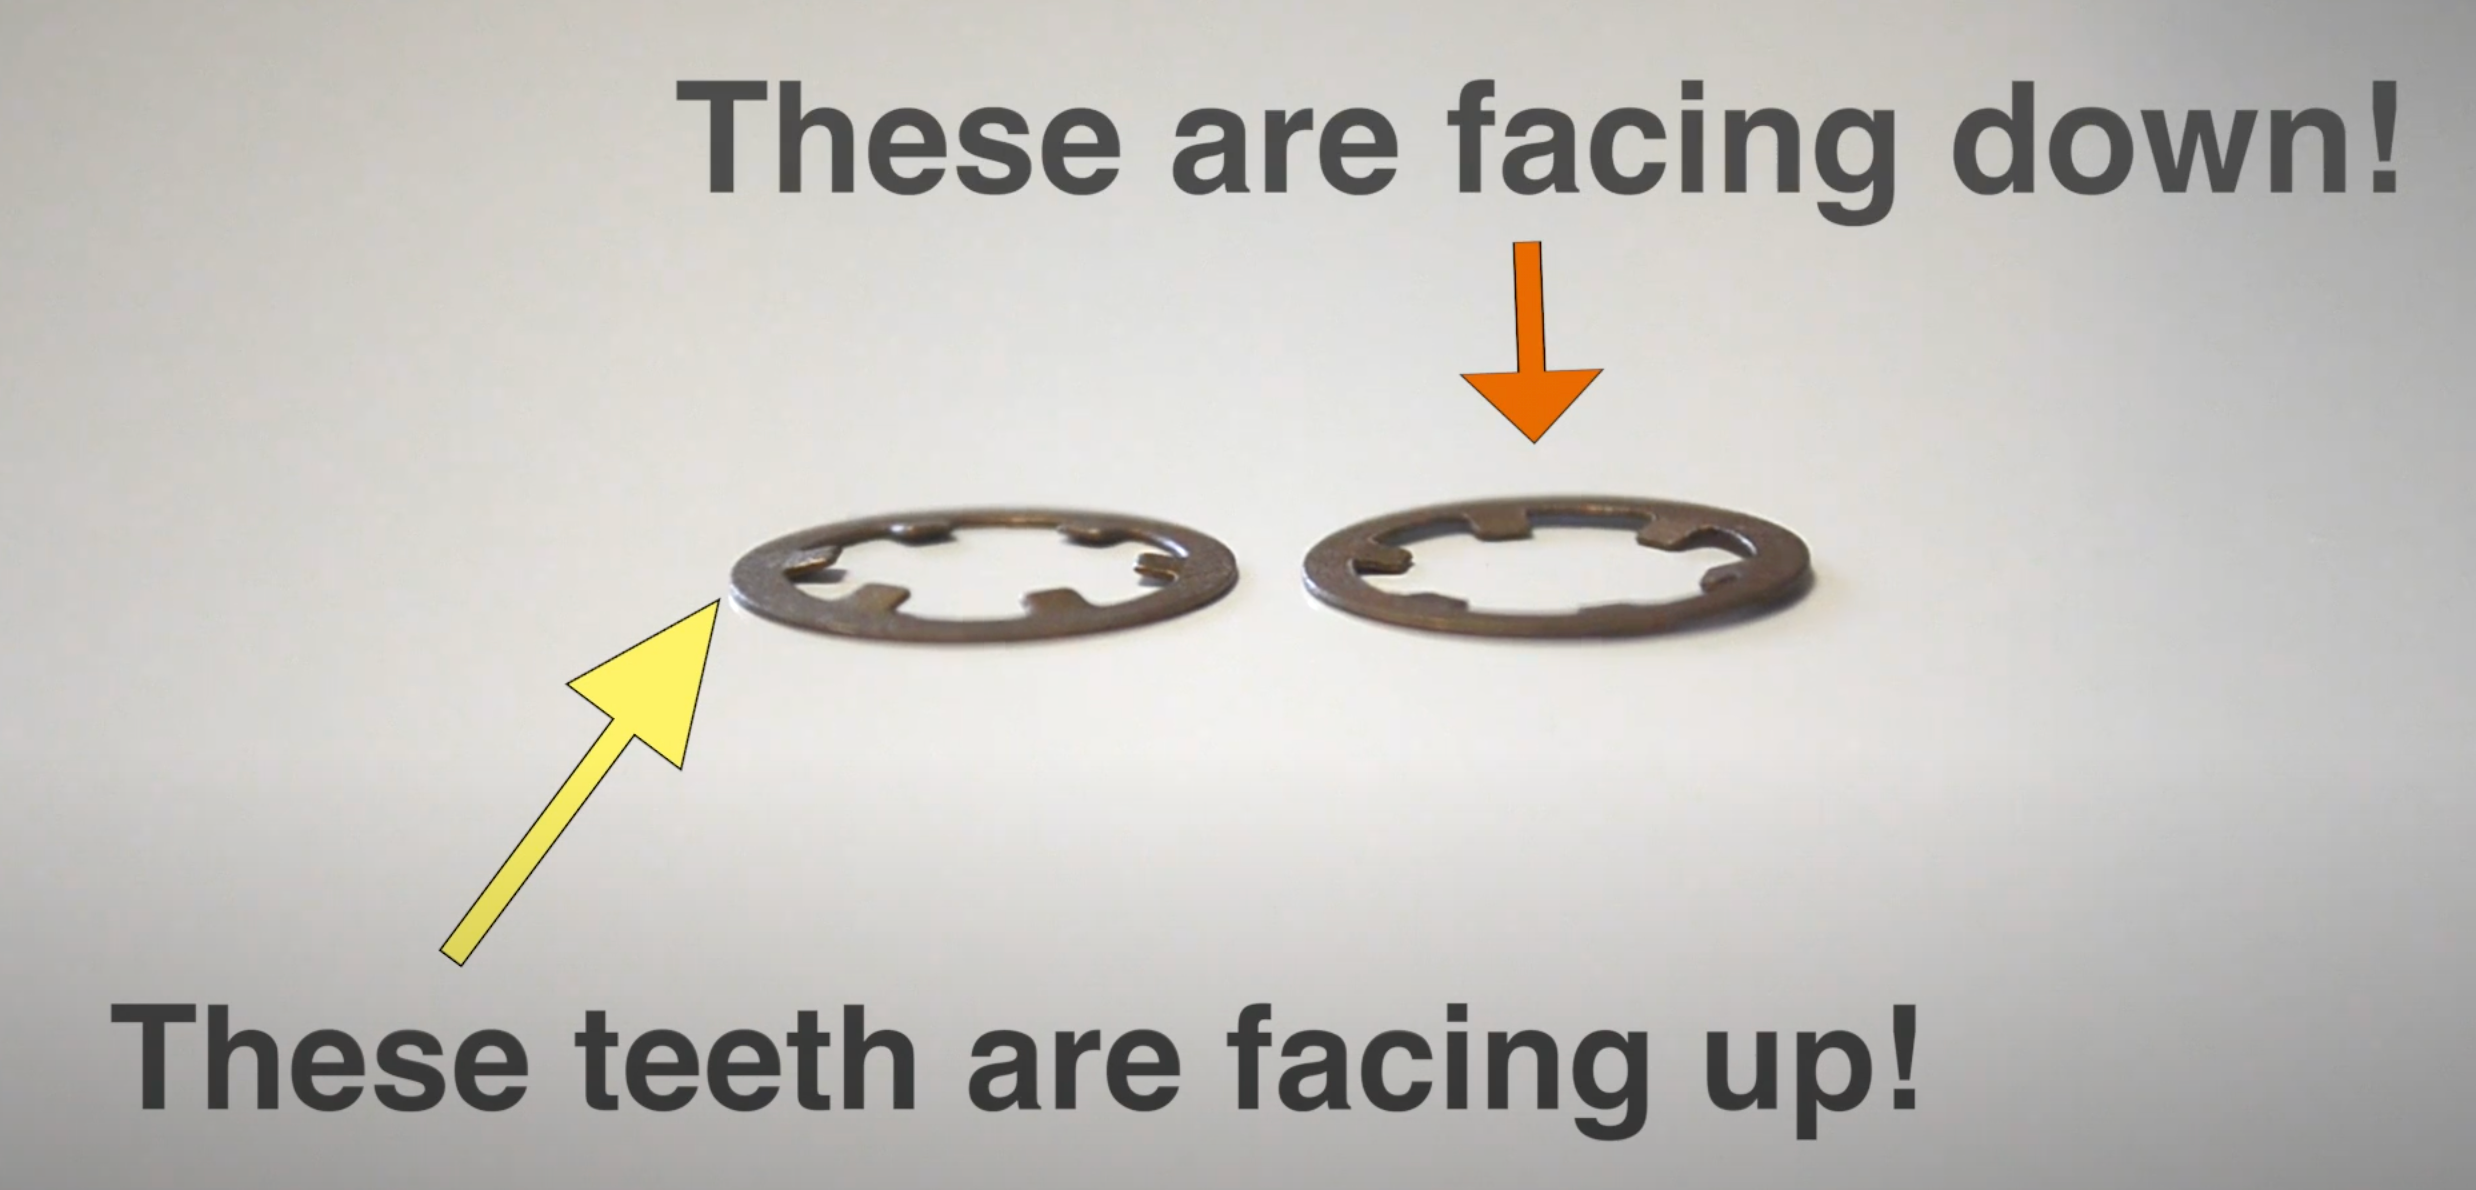
- Push a new retainer ring on by holding the other side of the rod in place while pushing the ring on with your fingers.
Step 9 Re-Install the Pet Door


- Reinstall the flap assembly into the door, wall, or panel. Line the holes up so you can see light through them, then screw them into place.
- Install the new hole plugs using a rubber mallet or another non-metal tool such as a hammer and wood.