Pet Door Guys "In the Glass" Old Style (Frame Has Hole Plugs) - Replacement Flap Instructions
Installation Instructions
Frame has hole plugs (units purchased before May 2020)
Click to view the New Style (Frame Does Not have Hole Plugs) Instructions.
 Difficulty
Easy
Difficulty
Easy
 Steps
09
Steps
09
 Time Required
0.5 Hours
Time Required
0.5 Hours
 Sections
03
Sections
03
 Flags
00
Flags
00
Parts
- 1 Replacement Flap
- 3 Retainer Rings
- 8 Hole Plugs*
Tools
- Magnetic Phillips head #2 screwdriver
- Flat head screwdriver
- Drill
*Replacement flaps come with two sets of hole plugs, but you will only need to use one on your flap. For your door, use the set of 8 large hole plugs and discard the set of 4 smaller hole plugs.
Step 1 Remove the Hole Plugs

- Remove the four hole plugs from the frame.
- You can drill a hole in each plug and wiggle the plug out with a screwdriver to pull them off.
Step 2 Unscrew the Frame

- Next unscrew the frame and remove the whole assembly from the glass unit.
- If needed, you may need to cut through the tape around the inside frame in order to release it from the glass unit.
Step 3 Remove Retainer Ring


- Now that the assembly that holds the flap is removed from the glass unit, look for a metal rod at the top of the frame that holds the flap.
- Remove a retainer ring from one end of the flap rod by forcing the ring off with a flathead screwdriver.
Step 4 Remove the Rod

- Once you have removed a retainer ring from one end of the flap rod, you can push the rod through the flap frame until it comes out on the other side.
- Pull the rod out and remove the flap.
Step 5 Expand the Bellows

- Gently pull on the bellows (accordion-like sides of the flap) to expand them.
- If needed, use a blow dryer to lightly heat the sides of the new flap and stretch them out to ensure a better seal.
Step 6 Check the Magnets

- Before installing your new flap you should check to make sure that the magnets in the flap and the frame are attracting correctly.
- If they seem to be repelling, you probably need to flip the flap around so they work properly.
Step 7 Position the New Flap
- Now slide the new flap in place in the frame, and guide the flap rod through the side of the frame, through the flap, and out the other side.
Step 8 Install Retainer Ring
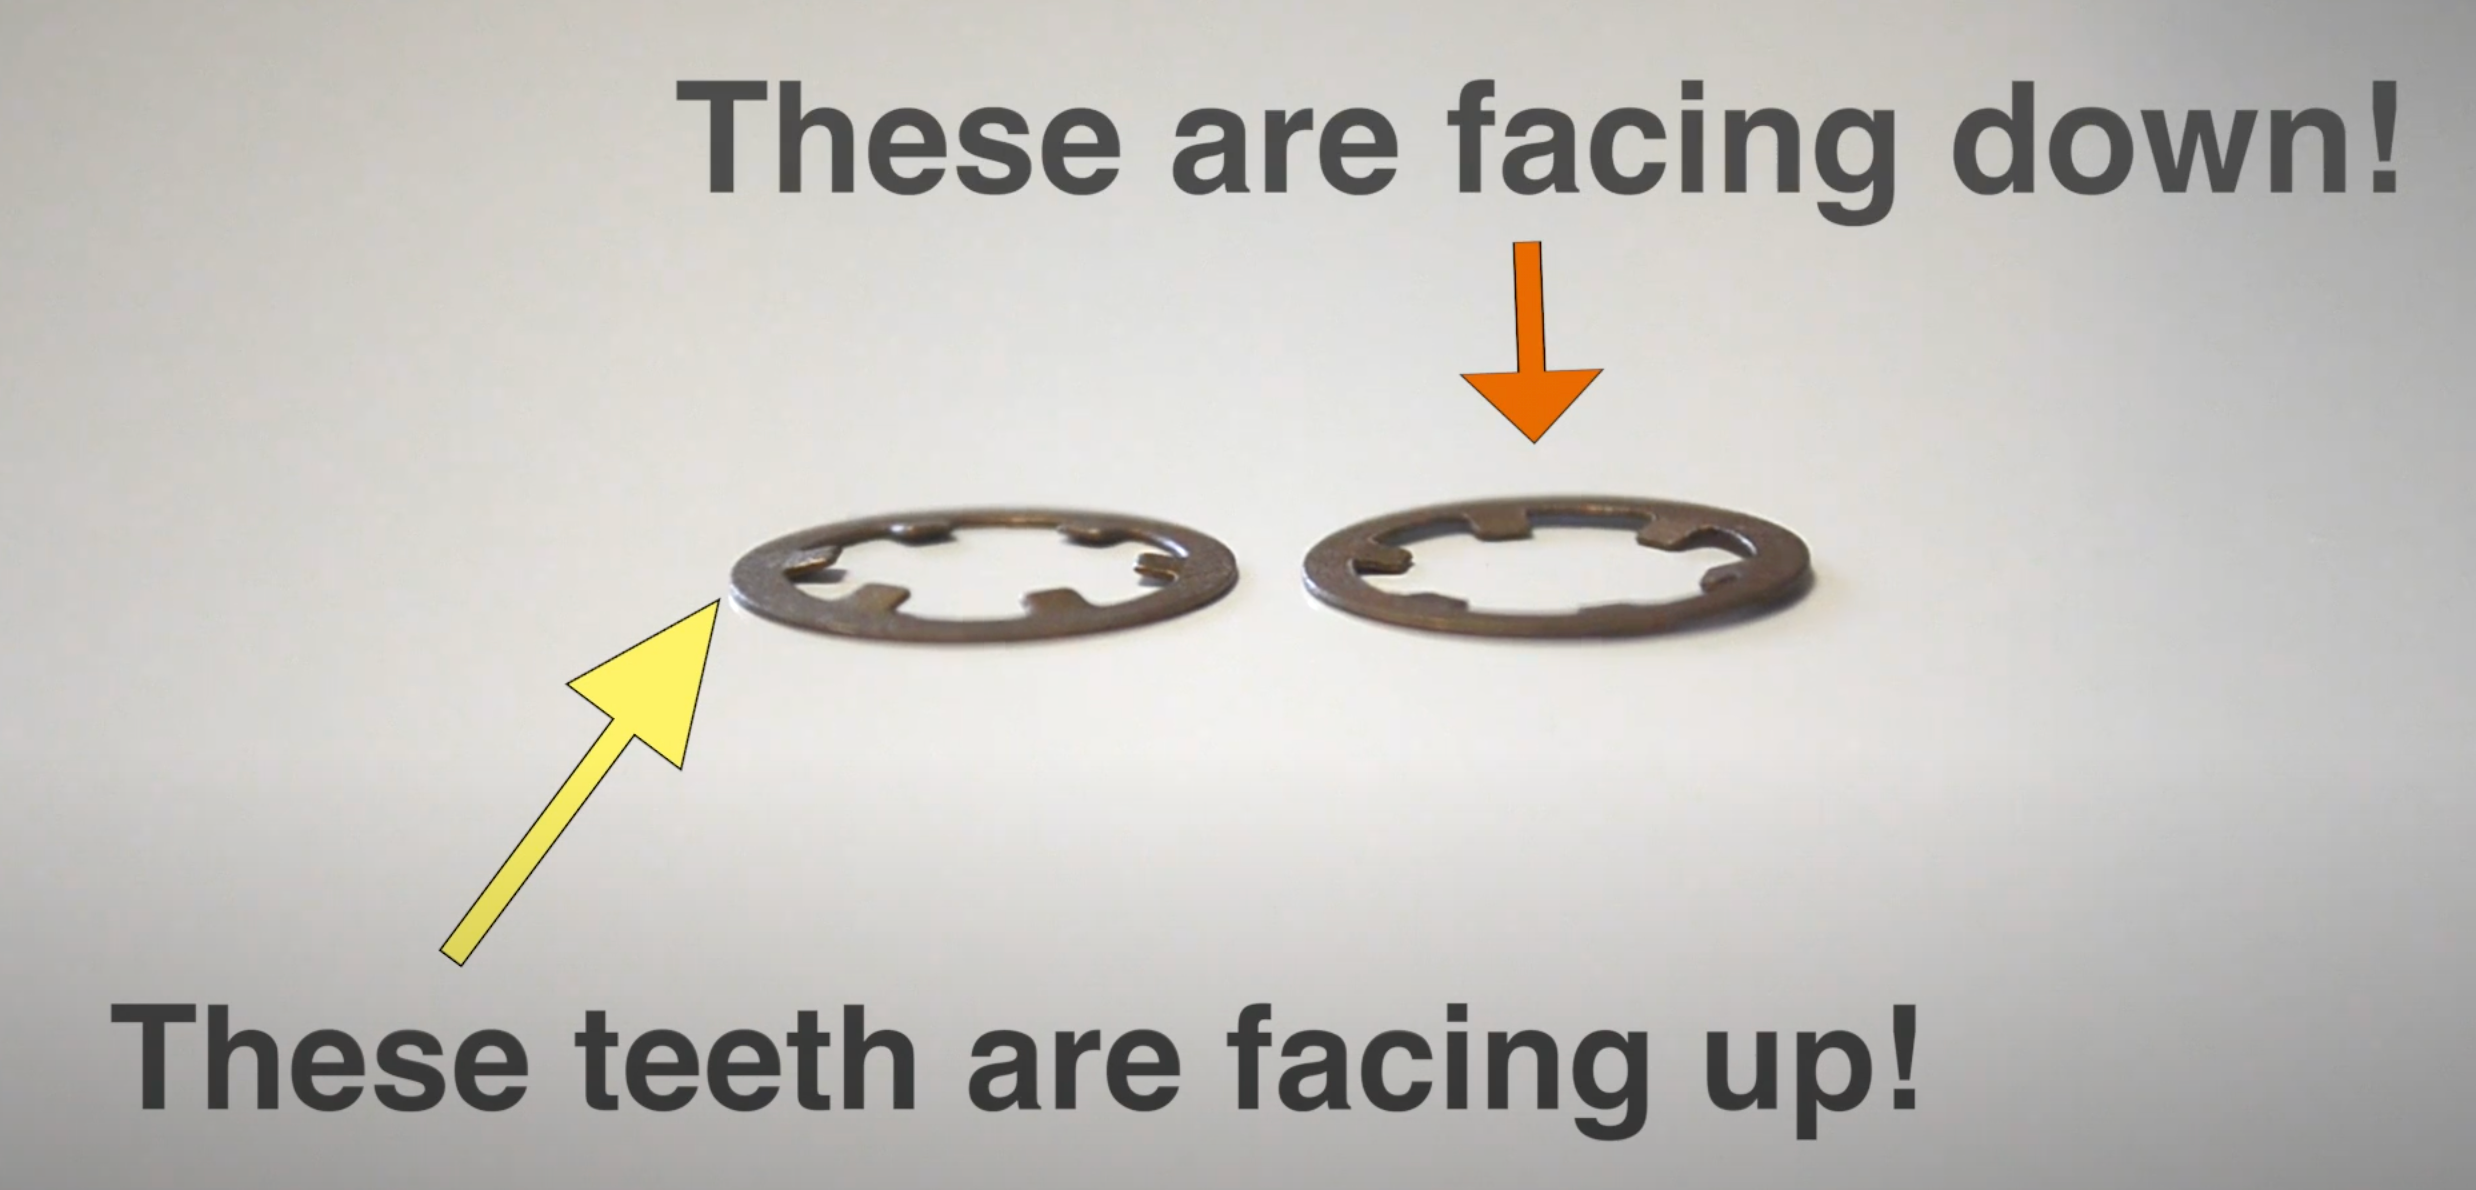
- Push the new retainer ring on by holding the other side of the rod in place while pushing the ring on using your finger.
- Each side only needs one ring, and the teeth need to bent facing away from the flap.
Step 9 Re-Install the Pet Door


- Reinstall the flap and frame into the glass unit.
- Line the holes up so you can see light through them, then screw the frame into place.
- Once you’re sure everything is correct, put the new hole plugs in using a rubber mallet (or a hammer and wood).
- You can refer to Endura Pet Door installation videos in the videos tab to help with this step.