- Regular price
- $29.99
- Sale price
- $29.99
- Unit price
- per
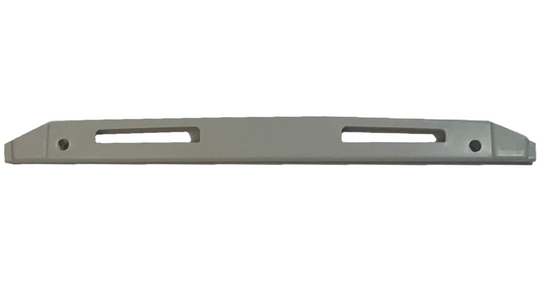
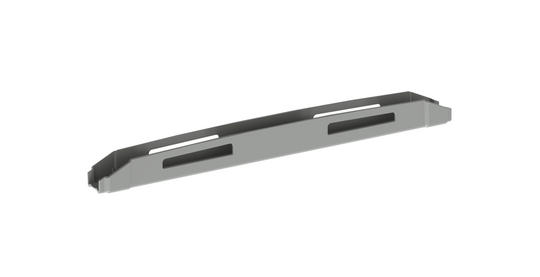
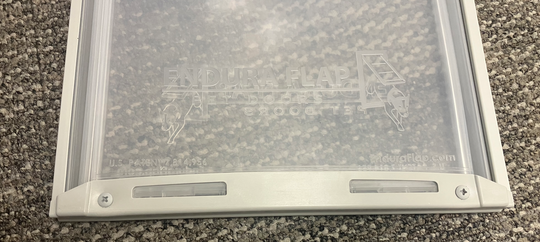
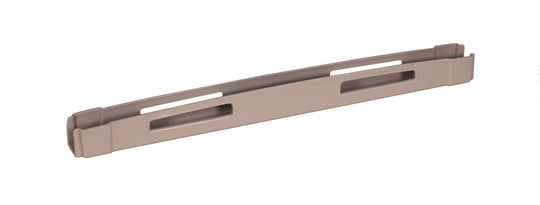
- Endura Flap Retainer Clips for maximum insulation and wind resistance
- Compatible with all Endura Flap Pet Door sizes
- For single flap doors, order the Inside Flap
- Easy installation process for a secure fit
- Replace worn or lost clips to maintain door efficiency
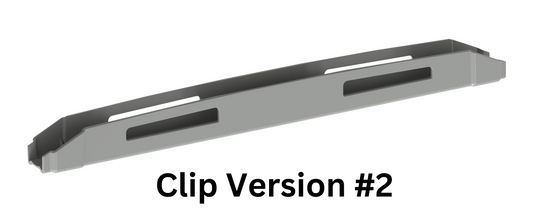
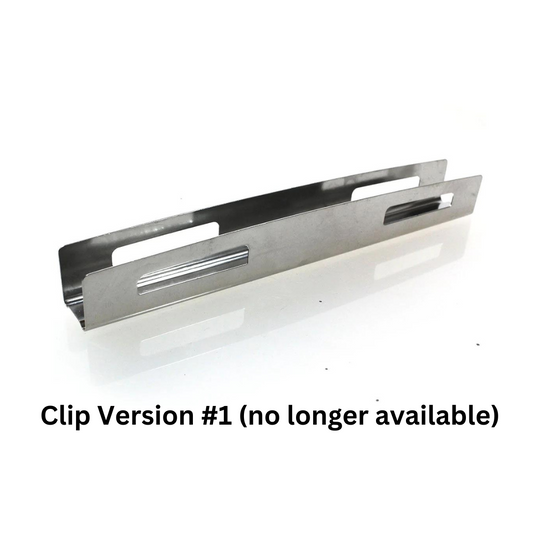
- Upgrade from older stainless steel models to the new plastic design

Product Details
- Enhance your Endura Flap Pet Door: These Retainer Clips are designed specifically for use with Endura Flap Pet Doors
- Maintain optimal insulation: Keep your home's energy costs down by ensuring the magnets on your pet door stay firmly in place
- Compatibility: Works with Small, Medium, Large, and Extra-Large Endura Flap Pet Door sizes
- Quick and simple installation: Fasten the retainer clip to your pet door flap with ease, using museum putty or double-sided tape for extra security
- Upgrade from older models: New plastic design offers improved durability compared to older stainless steel retainer clips
- Perfect for replacements: Order additional or replacement clips to keep your pet door functioning properly
- Comprehensive guidance: Easily follow provided instructions for proper magnet orientation and adjustment
- Reduced drafts: Enjoy increased insulation and minimized drafts, contributing to a more comfortable home environment
- Trusted by homeowners: Experience the benefits of a well-insulated pet door, with some users reporting a 30% reduction in heating costs
- Quality construction: Endura Flap products are known for their reliable performance and long-lasting durability
- Maintain peak performance: Keep your pet door functioning optimally by replacing worn or lost retainer clips
You can order additional or replacement magnets here. See how to adjust the magnets in the flap for proper orientation to attract the floating threshold (skip to 1:28).
Here is the suggested number of magnets for each flap size:
Small flap: 1 Small Magnet
Medium flap: 1 Large Magnet
Large flap: 2 Large Magnets
Extra-Large flap: 2 Large Magnets
Size Chart
| Flap Size | Flap Dimension | Rough Cut Out | Outside Frame Dimension |
|---|---|---|---|
| Small | 6" w x 11" h | 8 3/8" w x 15" h | 9 7/16" w x 15 3/4" h |
| Medium | 8 " w x 15" h | 10 1/2" w x 19" h | 11 1/2" w x 20" h |
| Large | 10" w x 19" h | 12 1/2" w x 23" h | 13 9/16" w x 23 5/8" h |
| Extra Large | 12" w x 23" h | 14 5/8" w x 27 1/8" h | 15 5/8" w x 28" h |
Note: If you lost the retainer clip, you would also need the Additional Magnet Kit.
Installation Instructions
 Difficulty Easy
  Steps 5
  Time Required 5 Minutes
  Sections 01
  Flags 03
 Parts
- 1 Retainer bottom
- 2 Barrel nuts
- 1 Small magnet set (Large flaps only)
- 2 Screws
- 3/16 (or 5mm) Brad point drill bit
Tools
- Phillips head drill bit
Please read instructions & notes thoroughly before installation.
Step 1 Remove the Retainer Bottom


- Pull on the retainer bottom to detach it from your flap. The magnets should be in the correct position when you remove the retainer bottom. However, if they fall out of the flap, you will need to reorient them in the appropriate direction.
Step 2 Snap On Your New Retainer Bottom


- Attach the new retainer bottom by pushing it onto the bottom of your flap.
Step 3 Drill Through the Flap


- Using a drill with a 3/16 (5mm) Brad point drill bit, drill through the small hole on the left side of your retainer bottom into your flap. Only drill halfway through the flap. Do not drill all the way through.
- Repeat for the remaining holes on the retainer bottom. There are two holes located on each side of the flap.
Step 4 Push the Barrels into the Flap


- On one side of the flap, push both of the barrels into the holes you drilled.
Step 5 Install the Screws Into the Flap


- Flip the flap over. Using a Phillips head screwdriver, screw the two screws through the remaining two holes. Tighten them until they are snug.
Videos
How to Align Magnets
Warranty
Endura Flap products have a lifetime warranty against defects in materials and workmanship under standard regular use. Endura Flap® Pet Doors Are 100% Designed, Engineered, and Manufactured in the USA. They are handmade for quality work in San Luis Obispo, California.
We will replace any defective parts at no cost to you. Defective parts may include incorrectly sized flaps, bent or dented frames, or improperly fitted parts.
Customers living outside of the continental United States are responsible for shipping costs as well as duties and taxes (if applicable) for any replacement parts or services covered under the warranty policy regardless of the replacement part or service's original cost.
Important Note:
Endura Flap® pet doors have a lifetime warranty for normal wear & tear and manufacturing defects (dog-chewing is not covered).
Damage caused by not using the product as intended, improper installation, and chewing is not covered under this warranty.Endura Flap Pet Doors used in a commercial application like a Kennel or Boarding facility have a three year warranty.
Customer Reviews

| Flap Size | Flap Dimension | Rough Cut Out | Outside Frame Dimension |
|---|---|---|---|
| Small | 6" w x 11" h | 8 3/8" w x 15" h | 9 7/16" w x 15 3/4" h |
| Medium | 8 " w x 15" h | 10 1/2" w x 19" h | 11 1/2" w x 20" h |
| Large | 10" w x 19" h | 12 1/2" w x 23" h | 13 9/16" w x 23 5/8" h |
| Extra Large | 12" w x 23" h | 14 5/8" w x 27 1/8" h | 15 5/8" w x 28" h |
Note: If you lost the retainer clip, you would also need the Additional Magnet Kit.
Installation Instructions
 Difficulty Easy
  Steps 5
  Time Required 5 Minutes
  Sections 01
  Flags 03
 Parts
- 1 Retainer bottom
- 2 Barrel nuts
- 1 Small magnet set (Large flaps only)
- 2 Screws
- 3/16 (or 5mm) Brad point drill bit
Tools
- Phillips head drill bit
Please read instructions & notes thoroughly before installation.
Step 1 Remove the Retainer Bottom


- Pull on the retainer bottom to detach it from your flap. The magnets should be in the correct position when you remove the retainer bottom. However, if they fall out of the flap, you will need to reorient them in the appropriate direction.
Step 2 Snap On Your New Retainer Bottom


- Attach the new retainer bottom by pushing it onto the bottom of your flap.
Step 3 Drill Through the Flap


- Using a drill with a 3/16 (5mm) Brad point drill bit, drill through the small hole on the left side of your retainer bottom into your flap. Only drill halfway through the flap. Do not drill all the way through.
- Repeat for the remaining holes on the retainer bottom. There are two holes located on each side of the flap.
Step 4 Push the Barrels into the Flap


- On one side of the flap, push both of the barrels into the holes you drilled.
Step 5 Install the Screws Into the Flap


- Flip the flap over. Using a Phillips head screwdriver, screw the two screws through the remaining two holes. Tighten them until they are snug.
Videos
How to Align Magnets
Warranty
Endura Flap products have a lifetime warranty against defects in materials and workmanship under standard regular use. Endura Flap® Pet Doors Are 100% Designed, Engineered, and Manufactured in the USA. They are handmade for quality work in San Luis Obispo, California.
We will replace any defective parts at no cost to you. Defective parts may include incorrectly sized flaps, bent or dented frames, or improperly fitted parts.
Customers living outside of the continental United States are responsible for shipping costs as well as duties and taxes (if applicable) for any replacement parts or services covered under the warranty policy regardless of the replacement part or service's original cost.
Important Note:
Endura Flap® pet doors have a lifetime warranty for normal wear & tear and manufacturing defects (dog-chewing is not covered).
Damage caused by not using the product as intended, improper installation, and chewing is not covered under this warranty.Endura Flap Pet Doors used in a commercial application like a Kennel or Boarding facility have a three year warranty.
Customer Reviews
 Lifetime Warranty
 Fast Shipping
 100% Secure Checkout
 Easy Returns





 Product Details