


- Regular price
- $79.99
- Sale price
- $79.99
- Unit price
- per


Over time, daily use and exposure to the elements can affect how a flap performs. A replacement flap restores the original movement, seal, and closure your Endura Flap system was designed to deliver, helping maintain a more consistent barrier between indoors and out.
Built for Everyday Use
Each flap is formed from a flexible polyolefin-based polymer selected for durability and resilience. It remains responsive across temperature changes rather than becoming stiff, allowing pets to move through comfortably while still supporting proper closure after each use.
Magnets work in combination with the flap to guide it back into position, helping maintain a more reliable seal against wind and airflow. Replacing the flap helps restore that alignment and overall performance.
Complete Kit for a Clean Refresh
Each kit includes the core components needed to return the flap to proper working condition, including pivot washers and a magnet set. Hole plugs are also included to match both original square corner frames and updated 45 degree corner frames for a consistent finished look.
Thermo Panels, Thermo Sashes, and new Pet Door Guys in-glass installations do not require hole plugs.
Wall mount pet doors with original square corner joints require threaded wall studs.
Straightforward Replacement
Full instructions are available for each Endura Flap configuration, guiding a clean replacement process and helping ensure proper alignment once installed.
 Weather-Tight
 Pet Door Looks Good as New
 Easy Installation
 Product Details
Product Details
Over time, daily use and exposure to the elements can affect how a flap performs. A replacement flap restores the original movement, seal, and closure your Endura Flap system was designed to deliver, helping maintain a more consistent barrier between indoors and out.
Built for Everyday Use
Each flap is formed from a flexible polyolefin-based polymer selected for durability and resilience. It remains responsive across temperature changes rather than becoming stiff, allowing pets to move through comfortably while still supporting proper closure after each use.
Magnets work in combination with the flap to guide it back into position, helping maintain a more reliable seal against wind and airflow. Replacing the flap helps restore that alignment and overall performance.
Complete Kit for a Clean Refresh
Each kit includes the core components needed to return the flap to proper working condition, including pivot washers and a magnet set. Hole plugs are also included to match both original square corner frames and updated 45 degree corner frames for a consistent finished look.
Thermo Panels, Thermo Sashes, and new Pet Door Guys in-glass installations do not require hole plugs.
Wall mount pet doors with original square corner joints require threaded wall studs.
Straightforward Replacement
Full instructions are available for each Endura Flap configuration, guiding a clean replacement process and helping ensure proper alignment once installed.
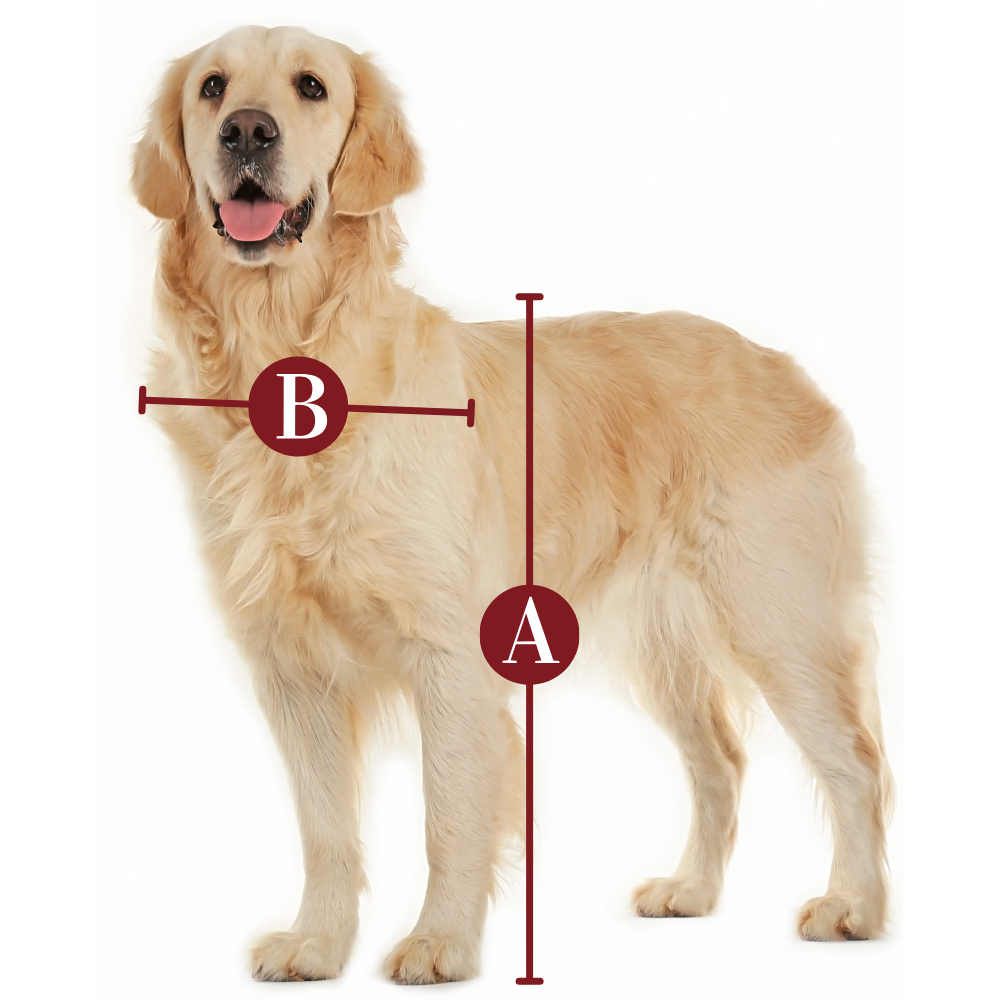
Size Chart
| Flap Size | Flap Dimension |
|---|---|
| Small | 6" w x 11" h |
| Medium | 8 " w x 15" h |
| Large | 10" w x 19" h |
| Extra Large | 12" w x 23" h |
| XX Large | 14" w x 27" h |
Flap rods are purchased separately: Stock No. 19PPRod
Installation Instructions
Double Flap Door Mount, Single & Double Flap Wall Mount & Vinyl Panel
Click to view the Double Flap Door Mount Replacement Flap Instructions.
 Difficulty Easy
  Steps 09
  Time Required 0.5 Hours
  Sections 03
  Flags 04
 Parts
- 1 Replacement Flap
- 3 Retainer Rings
- 8 Hole Plugs*
Tools
- Magnetic Phillips head #2 screwdriver
- Flat head screwdriver
- Drill
*Replacement flaps come with two sets of hole plugs, but you will only need to use one on your flap. For your door, use the set of 8 large hole plugs and discard the set of 4 smaller hole plugs.
Step 1 Remove the Hole Plugs

- First remove the Endura Flap from the door or wall.
- To do this, you will need to remove the hole plugs. Don't worry, we sent you some extra ones!
- You can drill a hole in each plug and wiggle the plug out with a screwdriver to pull them off.
Step 2 Unscrew the Frame

- Use the Phillips head screwdriver to remove the screws that were under the hole plugs from the frame then remove the entire flap assembly from the door or wall.
- Carefully bend the tabs holding the tunnel together upwards until horizontal, then remove the long side pieces of the tunnel by sliding them off of the flattened tabs.
- You can use the flathead screwdriver to get it started. Careful! The tabs may snap off if bent too much.
Step 3 Remove Retainer Ring


- Look for a metal rod at the top of the flap frame—remove one of the circular metal retaining rings by forcing it off with a flathead screwdriver.
Step 4 Remove the Rod

- Push the metal rod through the flap frame until it comes out on the other side.
- Pull the rod out and remove the flap.
Step 5 Expand the Bellows

- Position the new flap in place in the frame and make sure the magnets are attracting correctly. If they are not, try flipping the flap around (switching the interior and exterior faces).
- Sometimes the bellows (accordion-like sides of the flap) contract during shipping and prevent the magnets from attracting. To fix this, remove the pivot washers from the top corners of the flap and use a blow dryer to lightly heat the bellows and stretch them back out.
Step 6 Check the Magnets

- Before installing your new flap you should check to make sure that the magnets in the flap and the frame are attracting correctly.
- If they seem to be repelling, you probably need to flip the flap around so they work properly.
Step 7 Position the New Flap
- Guide the metal rod back through the flap and frame.
Step 8 Install Retainer Ring
- Push a new retainer ring on by holding the other side of the rod in place while pushing the ring on with your fingers.
Step 9 Re-Install the Pet Door


- Reinstall the flap assembly into the door, wall, or panel. Line the holes up so you can see light through them, then screw them into place.
- Install the new hole plugs using a rubber mallet or another non-metal tool such as a hammer and wood.
Thermo/Quick Panel & Sliding Window
Difficulty Easy Steps 11 Time Required 0.5 Hours Sections 03 Flags 00 Parts
- 1 Replacement Flap
- 3 Retainer Rings
Tools
- Magnetic Phillips head #2 screwdriver
- Flat head screwdriver
Step 1 Position the Panel

- Lay the panel down on its edge, so that you can see the screw holes that are on the sides of the panel.
Step 2 Remove the Bottom Screws

- Remove the two screws nearest to the bottom of the panel on both sides.
Step 3 Loosen the Second Set of Screws

- Locate the second set of screws, right under the glass on either side.
- Loosen each screw a quarter turn.
Step 4 Remove the Flap

- Slide the flap assembly out of the bottom of the panel.
Step 5 Locate Flap Rod


- Locate the rod that holds the flap.
- If you have retainer rings that are holding the rod in place then you can pop one off using the flat head screwdriver.
- Then slide the rod out and remove the old flap.
- Slide the rod out and remove the old flap.
Step 6 Check the Magnets

- Position the new flap in place in the frame and make sure the magnets are attracting correctly. If they are not, try flipping the flap around (switching the interior and exterior faces).
Step 7 Loosen the Bellows
- Sometimes the bellows (accordion-like sides of the flap) contract during shipping and prevent the magnets from attracting.
- To fix this, remove the pivot washers from the top corners of the flap and use a blow dryer to lightly heat the bellows and stretch them back out.
Step 8 Position the New Flap
- Guide the rod through the flap and frame.
- If you removed a retainer ring, put a new one on by holding the other side of the rod in place while pushing the ring on with your fingers.
Step 9 Re-Install Flap Assembly

- Slide the flap assembly back in place in the bottom of the panel.
- Be sure that the tracks for the locking cover are on the same side as the height adjustment locks at the top of the panel.
Step 10 Attach Bottom Piece

- Screw in the bottom piece with the two screws that you removed.
Step 11 Tighten Middle Screws
- Tighten the screws that are under the glass.
Sash Window Panel
 Printable Version
 Parts
- 1 Replacement Flap
- 3 Retainer Rings
Tools
- Magnetic Phillips head #2 screwdriver
- Flat head screwdriver
Step 1 Position the Panel

- Lay the sash panel down on its side so that you can see the screw holes on the sides by the flap.
Step 2 Remove Screws
- Remove the two screws nearest to the side of the flap on both the top and bottom using the Phillips head screwdriver and the electric drill.
Step 3 Remove Side Piece
- Slide out the side piece so that you can access the rod at the top of the flap.
Step 4 Remove Retainer Ring

- If you have retainer rings, you will need to loosen the middle set of screws and remove the entire flap and frame assembly from the unit. Then you can pop one ring off using the flat head screwdriver.
- If there is not a ring, instead of loosening screws and removing the flap frame assembly you can keep the assembly in place and slide just the rod out towards you to remove the flap.
Step 5 Remove Old Flap
- Remove the old flap.
- Position the new flap in place in the frame and make sure the magnets are attracting correctly. If they are not, try flipping the flap around (switching the interior and exterior faces).
Step 6 Stretch the Bellows
- Sometimes the bellows (accordion-like sides of the flap) contract during shipping and prevent the magnets from attracting.
- To fix this, remove the pivot washers from the top corners of the flap and use a blow dryer to lightly heat the bellows and stretch them back out.
Step 7 Position the New Flap
- Slide the rod back through the top of the flap.
Step 8 Re-Install Flap Assembly
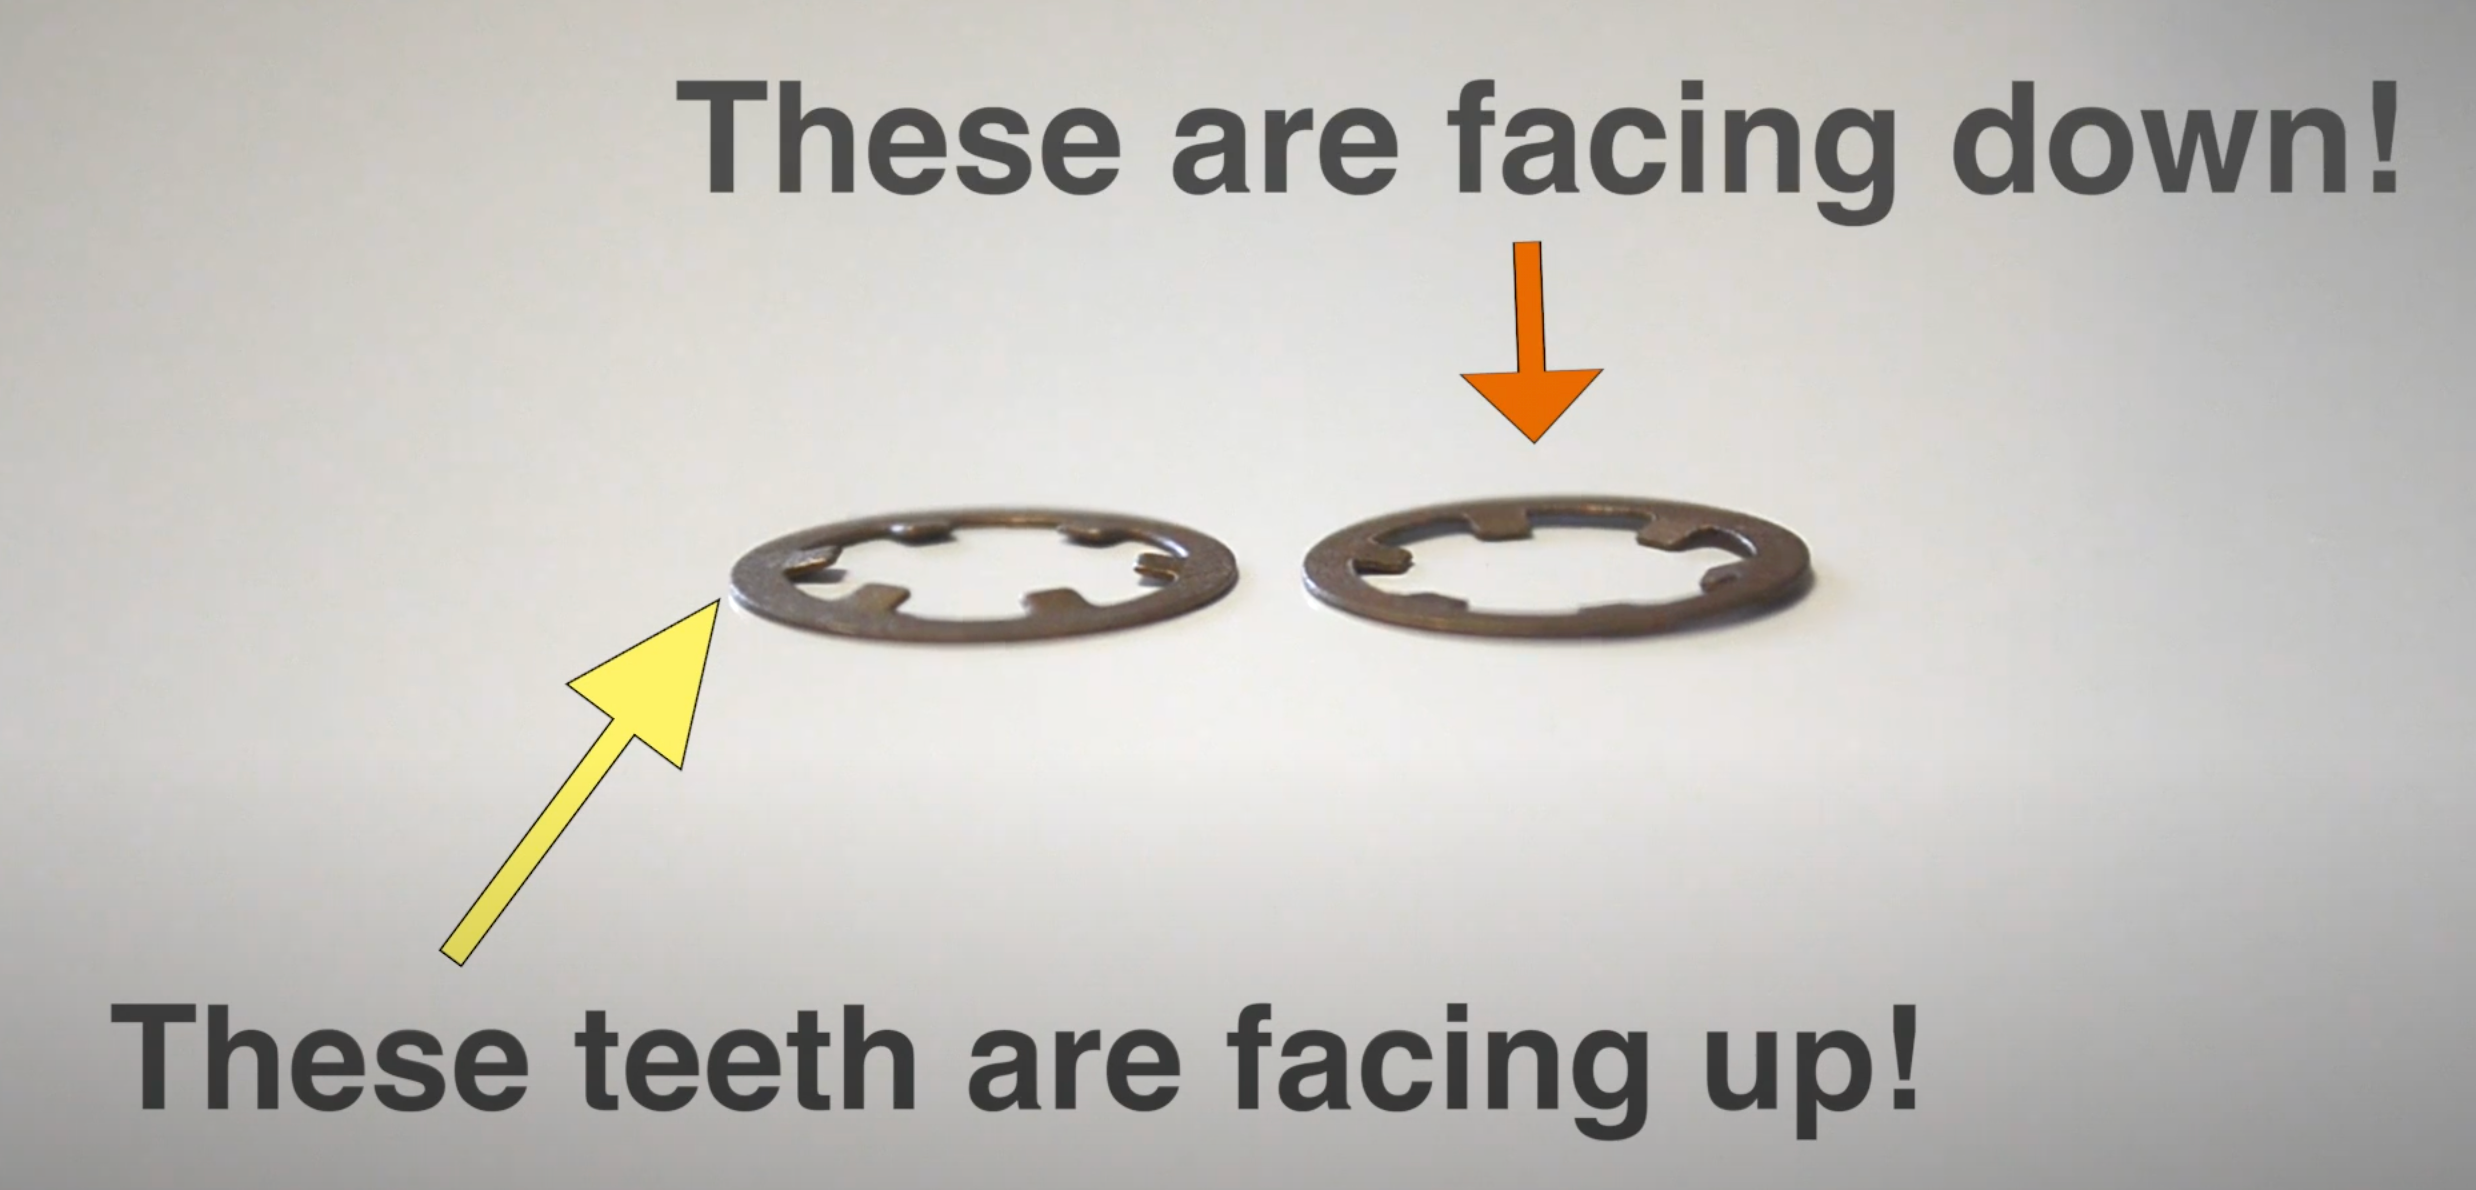
- If you removed the entire flap and frame assembly and one of the retainer rings, install a new retainer ring with the teeth pointing out away from the flap and slide the entire assembly back into place.
Step 9 Re-Install Side Piece

- Screw the side piece that holds the flap assembly back in place with the two screws that you removed. If you loosened screws in the middle to remove the flap frame, tighten them back down.
Single Flap Door Mount (Updated Design)
Click to view the Double Flap Door Mount Replacement Flap Instructions.
Difficulty
Easy
Steps
06
Time Required
0.5 Hours
Sections
01
Flags
05
Parts
- 1 Replacement Flap
- 3 Retainer Rings
- 4 Hole Plugs*
Tools
- Magnetic Phillips head #2 screwdriver
- Flat head screwdriver
- Drill
*Replacement flaps come with two sets of hole plugs, but you will only need to use one on your flap. For your door, use the smaller 4 hole plugs and discard the larger set of 8.
Step 1 REMOVE THE SCREWS

- Remove the screws from the interior frame with the Phillips head screwdriver.
- As needed, cut through any caulking to remove the frame you are replacing the flap for.
Step 2 REMOVE THE FLAP ROD

- Look for a metal rod at the top of the flap frame—remove one of the circular metal retaining rings by forcing it off with a flathead screwdriver.
- You only need to remove one retainer ring.
- Push the metal rod through the flap frame until it comes out on the other side. Pull the rod out and remove the flap.
Step 3 REPLACE THE FLAP

- Position the new flap in place in the frame and make sure the magnets are attracting correctly. If they are not, try flipping the flap around (switching the interior and exterior faces).
Step 4 REINSTALL THE ROD

- Guide the metal rod back through the flap and frame.
- Push a new retainer ring on by holding the other side of the rod in place while pushing the ring on with your fingers.
Step 5 REINSTALL FLAP ASSEMBLY

- Reinstall the flap assembly into the opening, then screw them into place.
- Install the included new set of hole plugs by pressing them on by hand.
FAQ
|
Are the flap replacement instructions the same for each Endura Flap model? No. Each Endura Flap has a different set of instructions for changing the flap. Please check the instructions that came with your flap and watch the instructional video that corresponds to the type of door you have. |
|
Can I purchase the hole plugs, retainer clip, and magnets separately? Yes, you can find the hole plugs, retainer clip, and magnets on our website. You can also check out our complete list of replacement parts and accessories. |
|
Do I need to remove the entire frame to take out the flap? Yes. You can watch this video to see how to take out the frame. |
|
Does the replacement flap come with a new rod? The rod must be purchased separately. However, 99.9% of the time, the rod will be re-usable even if your pet tears up the flap. |
|
How do I know what size flap I need? You can measure the dimensions of your flap and compare them to the flap size chart on this page. |
|
How many magnets come with each replacement flap? That depends on the size of the flap:
|
|
My Thermo Panel does not have the hole plugs and brass retainer rings - where do these Endura Flap parts go? Our replacement flap sets are designed to be universal for all door models. If you have a door that does not require the hole plugs or brass retainer rings, you can disregard those parts. |
|
What does the flap come with? It comes with hole plugs, pivot washers, and magnets for the bottom of the flap. |
Warranty
Endura Flap products have a lifetime warranty against defects in materials and workmanship under standard regular use. Endura Flap® Pet Doors Are 100% Designed, Engineered, and Manufactured in the USA. They are handmade for quality work in San Luis Obispo, California.
We will replace any defective parts at no cost to you. Defective parts may include incorrectly sized flaps, bent or dented frames, or improperly fitted parts.
Customers living outside of the continental United States are responsible for shipping costs as well as duties and taxes (if applicable) for any replacement parts or services covered under the warranty policy regardless of the replacement part or service's original cost.
Important Note:
- Endura Flap® pet doors have a lifetime warranty for normal wear & tear and manufacturing defects (dog-chewing is not covered).
- Damage caused by not using the product as intended, improper installation, and chewing is not covered under this warranty.
- Endura Flap Pet Doors used in a commercial application like a Kennel or Boarding facility have a three year warranty.
Customer Reviews
- Reviews
- Questions

I love the replacement endurance flap but it’s very hard to take the old flap off and install the replacement flap that is in an exterior brick wall. You have to take the entire dog door out of the wall in order to put the new flap on.
Good flap
Worked like a charm. Dogs love it especially the puppy as this one taste better than the last one.
Only one complaint.
I like that these have been redesigned so that there are screws holding the bottom piece on the flap. Here’s where there’s a problem, though: adding magnets. My son had to break the ends off of the magnets that we added to make it so our cats can’t open the flaps to get out. This was the only way we could put the screws back in to hold the bottom of the flaps together.
Fit perfectly to the door we bought over 10 years ago, 100% best pet purchase ever
It all looked so easy until we started to replace it. My dog door is like 10 years old with two big dogs and at one time three running through it like crazy fools. A lot has changed since then. The instructions did not match what we had. We prevailed, but it was very difficult to replace it. The product is 5+ for sure. Even after 10 years the quality is hands down 5+ and the best dog door on the market. I almost rated the flaps 4 stars but believe I’ll easily get another 10 years with the replacements.

| Flap Size | Flap Dimension |
|---|---|
| Small | 6" w x 11" h |
| Medium | 8 " w x 15" h |
| Large | 10" w x 19" h |
| Extra Large | 12" w x 23" h |
| XX Large | 14" w x 27" h |
Flap rods are purchased separately: Stock No. 19PPRod
Installation Instructions
Double Flap Door Mount, Single & Double Flap Wall Mount & Vinyl Panel
Click to view the Double Flap Door Mount Replacement Flap Instructions.
Difficulty Easy Steps 09 Time Required 0.5 Hours Sections 03 Flags 04 Parts
- 1 Replacement Flap
- 3 Retainer Rings
- 8 Hole Plugs*
Tools
- Magnetic Phillips head #2 screwdriver
- Flat head screwdriver
- Drill
*Replacement flaps come with two sets of hole plugs, but you will only need to use one on your flap. For your door, use the set of 8 large hole plugs and discard the set of 4 smaller hole plugs.
Step 1 Remove the Hole Plugs
- First remove the Endura Flap from the door or wall.
- To do this, you will need to remove the hole plugs. Don't worry, we sent you some extra ones!
- You can drill a hole in each plug and wiggle the plug out with a screwdriver to pull them off.
Step 2 Unscrew the Frame
- Use the Phillips head screwdriver to remove the screws that were under the hole plugs from the frame then remove the entire flap assembly from the door or wall.
- Carefully bend the tabs holding the tunnel together upwards until horizontal, then remove the long side pieces of the tunnel by sliding them off of the flattened tabs.
- You can use the flathead screwdriver to get it started. Careful! The tabs may snap off if bent too much.
Step 3 Remove Retainer Ring
- Look for a metal rod at the top of the flap frame—remove one of the circular metal retaining rings by forcing it off with a flathead screwdriver.
Step 4 Remove the Rod
- Push the metal rod through the flap frame until it comes out on the other side.
- Pull the rod out and remove the flap.
Step 5 Expand the Bellows
- Position the new flap in place in the frame and make sure the magnets are attracting correctly. If they are not, try flipping the flap around (switching the interior and exterior faces).
- Sometimes the bellows (accordion-like sides of the flap) contract during shipping and prevent the magnets from attracting. To fix this, remove the pivot washers from the top corners of the flap and use a blow dryer to lightly heat the bellows and stretch them back out.
Step 6 Check the Magnets
- Before installing your new flap you should check to make sure that the magnets in the flap and the frame are attracting correctly.
- If they seem to be repelling, you probably need to flip the flap around so they work properly.
Step 7 Position the New Flap
- Guide the metal rod back through the flap and frame.
Step 8 Install Retainer Ring
- Push a new retainer ring on by holding the other side of the rod in place while pushing the ring on with your fingers.
Step 9 Re-Install the Pet Door
- Reinstall the flap assembly into the door, wall, or panel. Line the holes up so you can see light through them, then screw them into place.
- Install the new hole plugs using a rubber mallet or another non-metal tool such as a hammer and wood.
Thermo/Quick Panel & Sliding Window
Difficulty Easy Steps 11 Time Required 0.5 Hours Sections 03 Flags 00 Parts
- 1 Replacement Flap
- 3 Retainer Rings
Tools
- Magnetic Phillips head #2 screwdriver
- Flat head screwdriver
Step 1 Position the Panel
- Lay the panel down on its edge, so that you can see the screw holes that are on the sides of the panel.
Step 2 Remove the Bottom Screws
- Remove the two screws nearest to the bottom of the panel on both sides.
Step 3 Loosen the Second Set of Screws
- Locate the second set of screws, right under the glass on either side.
- Loosen each screw a quarter turn.
Step 4 Remove the Flap
- Slide the flap assembly out of the bottom of the panel.
Step 5 Locate Flap Rod
- Locate the rod that holds the flap.
- If you have retainer rings that are holding the rod in place then you can pop one off using the flat head screwdriver.
- Then slide the rod out and remove the old flap.
- Slide the rod out and remove the old flap.
Step 6 Check the Magnets
- Position the new flap in place in the frame and make sure the magnets are attracting correctly. If they are not, try flipping the flap around (switching the interior and exterior faces).
Step 7 Loosen the Bellows
- Sometimes the bellows (accordion-like sides of the flap) contract during shipping and prevent the magnets from attracting.
- To fix this, remove the pivot washers from the top corners of the flap and use a blow dryer to lightly heat the bellows and stretch them back out.
Step 8 Position the New Flap
- Guide the rod through the flap and frame.
- If you removed a retainer ring, put a new one on by holding the other side of the rod in place while pushing the ring on with your fingers.
Step 9 Re-Install Flap Assembly
- Slide the flap assembly back in place in the bottom of the panel.
- Be sure that the tracks for the locking cover are on the same side as the height adjustment locks at the top of the panel.
Step 10 Attach Bottom Piece
- Screw in the bottom piece with the two screws that you removed.
Step 11 Tighten Middle Screws
- Tighten the screws that are under the glass.
Sash Window Panel
Parts
- 1 Replacement Flap
- 3 Retainer Rings
Tools
- Magnetic Phillips head #2 screwdriver
- Flat head screwdriver
Step 1 Position the Panel
- Lay the sash panel down on its side so that you can see the screw holes on the sides by the flap.
Step 2 Remove Screws
- Remove the two screws nearest to the side of the flap on both the top and bottom using the Phillips head screwdriver and the electric drill.
Step 3 Remove Side Piece
- Slide out the side piece so that you can access the rod at the top of the flap.
Step 4 Remove Retainer Ring
- If you have retainer rings, you will need to loosen the middle set of screws and remove the entire flap and frame assembly from the unit. Then you can pop one ring off using the flat head screwdriver.
- If there is not a ring, instead of loosening screws and removing the flap frame assembly you can keep the assembly in place and slide just the rod out towards you to remove the flap.
Step 5 Remove Old Flap
- Remove the old flap.
- Position the new flap in place in the frame and make sure the magnets are attracting correctly. If they are not, try flipping the flap around (switching the interior and exterior faces).
Step 6 Stretch the Bellows
- Sometimes the bellows (accordion-like sides of the flap) contract during shipping and prevent the magnets from attracting.
- To fix this, remove the pivot washers from the top corners of the flap and use a blow dryer to lightly heat the bellows and stretch them back out.
Step 7 Position the New Flap
- Slide the rod back through the top of the flap.
Step 8 Re-Install Flap Assembly
- If you removed the entire flap and frame assembly and one of the retainer rings, install a new retainer ring with the teeth pointing out away from the flap and slide the entire assembly back into place.
Step 9 Re-Install Side Piece
- Screw the side piece that holds the flap assembly back in place with the two screws that you removed. If you loosened screws in the middle to remove the flap frame, tighten them back down.
Single Flap Door Mount (Updated Design)
Click to view the Double Flap Door Mount Replacement Flap Instructions.
Difficulty
Easy
Steps
06
Time Required
0.5 Hours
Sections
01
Flags
05
Parts
- 1 Replacement Flap
- 3 Retainer Rings
- 4 Hole Plugs*
Tools
- Magnetic Phillips head #2 screwdriver
- Flat head screwdriver
- Drill
*Replacement flaps come with two sets of hole plugs, but you will only need to use one on your flap. For your door, use the smaller 4 hole plugs and discard the larger set of 8.
Step 1 REMOVE THE SCREWS
- Remove the screws from the interior frame with the Phillips head screwdriver.
- As needed, cut through any caulking to remove the frame you are replacing the flap for.
Step 2 REMOVE THE FLAP ROD
- Look for a metal rod at the top of the flap frame—remove one of the circular metal retaining rings by forcing it off with a flathead screwdriver.
- You only need to remove one retainer ring.
- Push the metal rod through the flap frame until it comes out on the other side. Pull the rod out and remove the flap.
Step 3 REPLACE THE FLAP
- Position the new flap in place in the frame and make sure the magnets are attracting correctly. If they are not, try flipping the flap around (switching the interior and exterior faces).
Step 4 REINSTALL THE ROD
- Guide the metal rod back through the flap and frame.
- Push a new retainer ring on by holding the other side of the rod in place while pushing the ring on with your fingers.
Step 5 REINSTALL FLAP ASSEMBLY
- Reinstall the flap assembly into the opening, then screw them into place.
- Install the included new set of hole plugs by pressing them on by hand.
FAQ
|
Are the flap replacement instructions the same for each Endura Flap model? No. Each Endura Flap has a different set of instructions for changing the flap. Please check the instructions that came with your flap and watch the instructional video that corresponds to the type of door you have. |
|
Can I purchase the hole plugs, retainer clip, and magnets separately? Yes, you can find the hole plugs, retainer clip, and magnets on our website. You can also check out our complete list of replacement parts and accessories. |
|
Do I need to remove the entire frame to take out the flap? Yes. You can watch this video to see how to take out the frame. |
|
Does the replacement flap come with a new rod? The rod must be purchased separately. However, 99.9% of the time, the rod will be re-usable even if your pet tears up the flap. |
|
How do I know what size flap I need? You can measure the dimensions of your flap and compare them to the flap size chart on this page. |
|
How many magnets come with each replacement flap? That depends on the size of the flap:
|
|
My Thermo Panel does not have the hole plugs and brass retainer rings - where do these Endura Flap parts go? Our replacement flap sets are designed to be universal for all door models. If you have a door that does not require the hole plugs or brass retainer rings, you can disregard those parts. |
|
What does the flap come with? It comes with hole plugs, pivot washers, and magnets for the bottom of the flap. |
Warranty
Endura Flap products have a lifetime warranty against defects in materials and workmanship under standard regular use. Endura Flap® Pet Doors Are 100% Designed, Engineered, and Manufactured in the USA. They are handmade for quality work in San Luis Obispo, California.
We will replace any defective parts at no cost to you. Defective parts may include incorrectly sized flaps, bent or dented frames, or improperly fitted parts.
Customers living outside of the continental United States are responsible for shipping costs as well as duties and taxes (if applicable) for any replacement parts or services covered under the warranty policy regardless of the replacement part or service's original cost.
Important Note:
- Endura Flap® pet doors have a lifetime warranty for normal wear & tear and manufacturing defects (dog-chewing is not covered).
- Damage caused by not using the product as intended, improper installation, and chewing is not covered under this warranty.
- Endura Flap Pet Doors used in a commercial application like a Kennel or Boarding facility have a three year warranty.
Customer Reviews
- Reviews
- Questions
I love the replacement endurance flap but it’s very hard to take the old flap off and install the replacement flap that is in an exterior brick wall. You have to take the entire dog door out of the wall in order to put the new flap on.
Good flap
Worked like a charm. Dogs love it especially the puppy as this one taste better than the last one.
Only one complaint.
I like that these have been redesigned so that there are screws holding the bottom piece on the flap. Here’s where there’s a problem, though: adding magnets. My son had to break the ends off of the magnets that we added to make it so our cats can’t open the flaps to get out. This was the only way we could put the screws back in to hold the bottom of the flaps together.
Fit perfectly to the door we bought over 10 years ago, 100% best pet purchase ever
It all looked so easy until we started to replace it. My dog door is like 10 years old with two big dogs and at one time three running through it like crazy fools. A lot has changed since then. The instructions did not match what we had. We prevailed, but it was very difficult to replace it. The product is 5+ for sure. Even after 10 years the quality is hands down 5+ and the best dog door on the market. I almost rated the flaps 4 stars but believe I’ll easily get another 10 years with the replacements.